In this tutorial, we'll create a custom Studio UI extension that adds a bulk price management tool to Pimcore Studio, protected by custom user permissions. You'll learn how to create custom permissions and build permission-protected UI extensions that integrate seamlessly with Pimcore Studio.
What We're Building
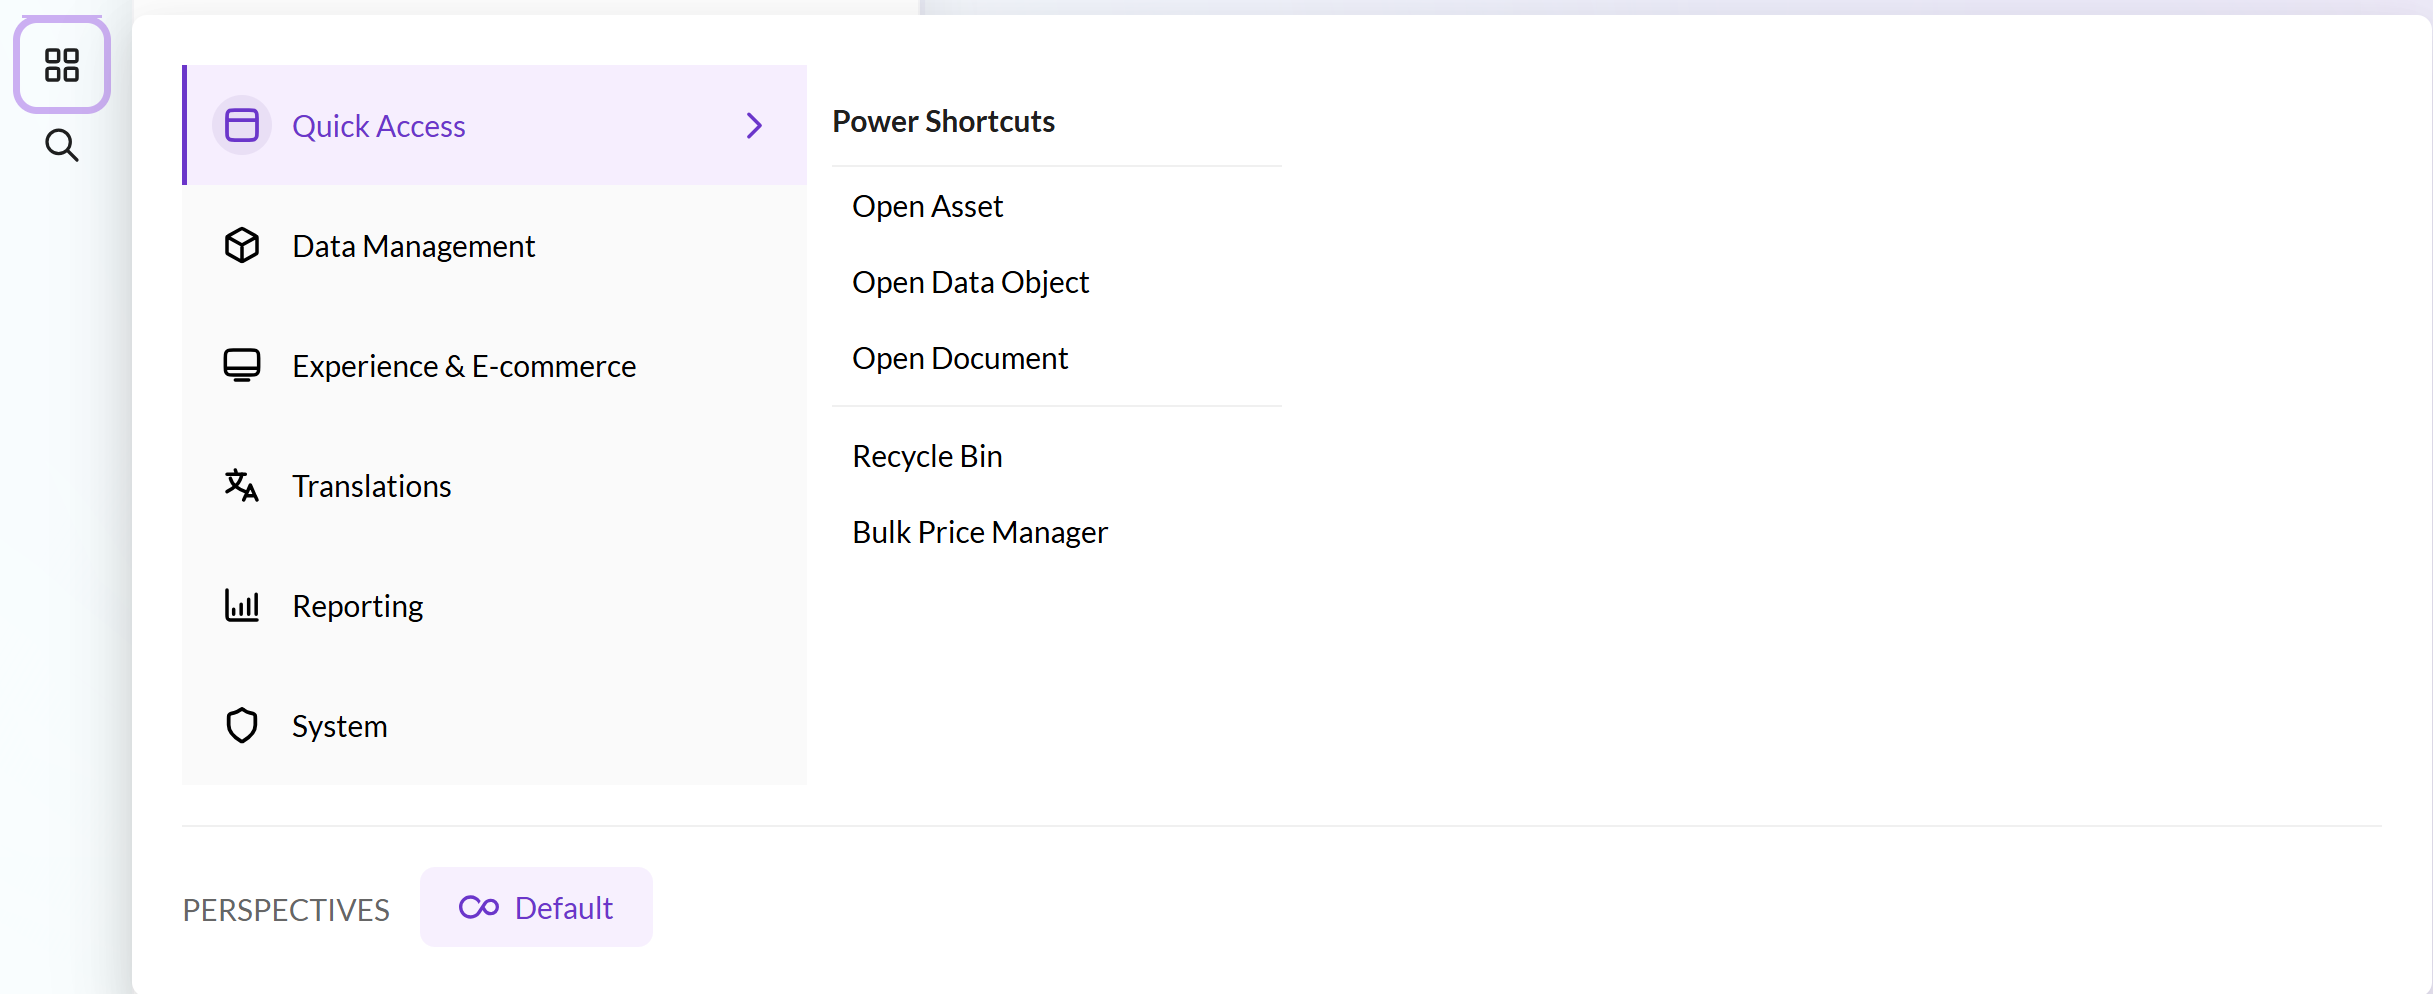
A Bulk Price Manager navigation widget that: - Appears under "Quick Access" in the Studio sidebar - Shows only to users with the custom_bulk_price_manage permission - Provides a UI for selecting products and applying bulk price adjustments
Creating Custom Permissions
Before we can lock down our UI, we need to create the actual permission. Here's how we create a custom permission in Pimcore:
Need more detail? Check out Pimcore's permissions guide for the full story on how permissions work.
Step 1: Create your permission
We'll start by writing a migration to create our custom_bulk_price_manage permission:
<?php
declare(strict_types=1);
namespace App\Migration;
use Doctrine\DBAL\Schema\Schema;
use Doctrine\Migrations\AbstractMigration;
use Pimcore\Model\User\Permission\Definition;
use Pimcore\Model\Translation;
final class Version20251218174229 extends AbstractMigration
{
public function getDescription(): string
{
return "Create demo permission.";
}
public function up(Schema $schema): void
{
// Create custom_bulk_price_manage permission
$manageKey = "custom_bulk_price_manage";
$managePermission = Definition::getByKey($manageKey);
if (null === $managePermission) {
$permission = new Definition();
$permission->setKey($manageKey);
$permission->setCategory("Demo Permission Group");
$permission->save();
}
}
public function down(Schema $schema): void
{
// Remove permission and translation if needed
$manageKey = "custom_bulk_price_manage";
$managePermission = Definition::getByKey($manageKey);
if ($managePermission) {
$managePermission->delete();
}
}
}
After running the migration, head to Settings → Users in Pimcore.
You'll see custom_bulk_price_manage listed under "Demo Permission Group" where you can assign it to users or roles.
Building the Studio UI Extension
Pimcore Studio uses React, TypeScript, and Ant Design for its UI. Extensions follow a modular plugin architecture with dependency injection.
Want to dive deeper? Check out the Pimcore Studio UI Bundle Documentation for more details on the architecture and available APIs.
Step 2: Create the React Component
Next, we'll stub out a basic UI component to represent our widget:
// ./bulk-price/components/BulkPriceManager.tsx
export const BulkPriceManager: React.FC = () => {
return (
<div>Hello world</div>
);
};
Step 3: Create the Plugin File
Then, we need to create our plugin file and register the new component (Hint: icon names can be found in the icon library)
// ./bulk-price/plugins/BulkPricePlugin.tsx
import {
container,
type IAbstractPlugin,
type AbstractModule
} from "@pimcore/studio-ui-bundle";
import { serviceIds } from "@pimcore/studio-ui-bundle/app";
import { type MainNavRegistry } from "@pimcore/studio-ui-bundle/modules/app";
import { type WidgetRegistry } from "@pimcore/studio-ui-bundle/modules/widget-manager";
import { BulkPriceManager } from "../components/BulkPriceManager";
export const BulkPricePlugin: IAbstractPlugin = {
name: "BulkPricePlugin",
onStartup({ moduleSystem }) {
moduleSystem.registerModule(BulkPriceModule);
},
};
export const BulkPriceModule: AbstractModule = {
onInit: (): void => {
const mainNavRegistryService = container.get<MainNavRegistry>(
serviceIds.mainNavRegistry
);
const widgetRegistryService = container.get<WidgetRegistry>(
serviceIds.widgetManager
);
// Register navigation item under QuickAccess
mainNavRegistryService.registerMainNavItem({
path: "QuickAccess/Bulk Price Manager",
widgetConfig: {
name: "Bulk Price Manager",
id: "bulk-price-manager",
component: "action-bulk-price-manager",
config: {
icon: {
type: "name",
value: "tax-class"
},
},
},
permission: 'custom_bulk_price_manage',
});
// Register the widget component
widgetRegistryService.registerWidget({
name: "action-bulk-price-manager",
component: BulkPriceManager,
});
},
};
Key Points:
- Path defines the navigation hierarchy (e.g., "Category/Subcategory/Item")
- Permission is where we use our custom permission key
- The component name must match between widget registration and navigation config
Step 4: Export the Plugin
All that's left is to update main.ts to export the new plugin:
import { BulkPricePlugin } from "./bulk-price/plugins/BulkPricePlugin";
export { BulkPricePlugin };
Important: All plugins exported from main.ts are automatically discovered by Studio. No additional PHP registration is needed!
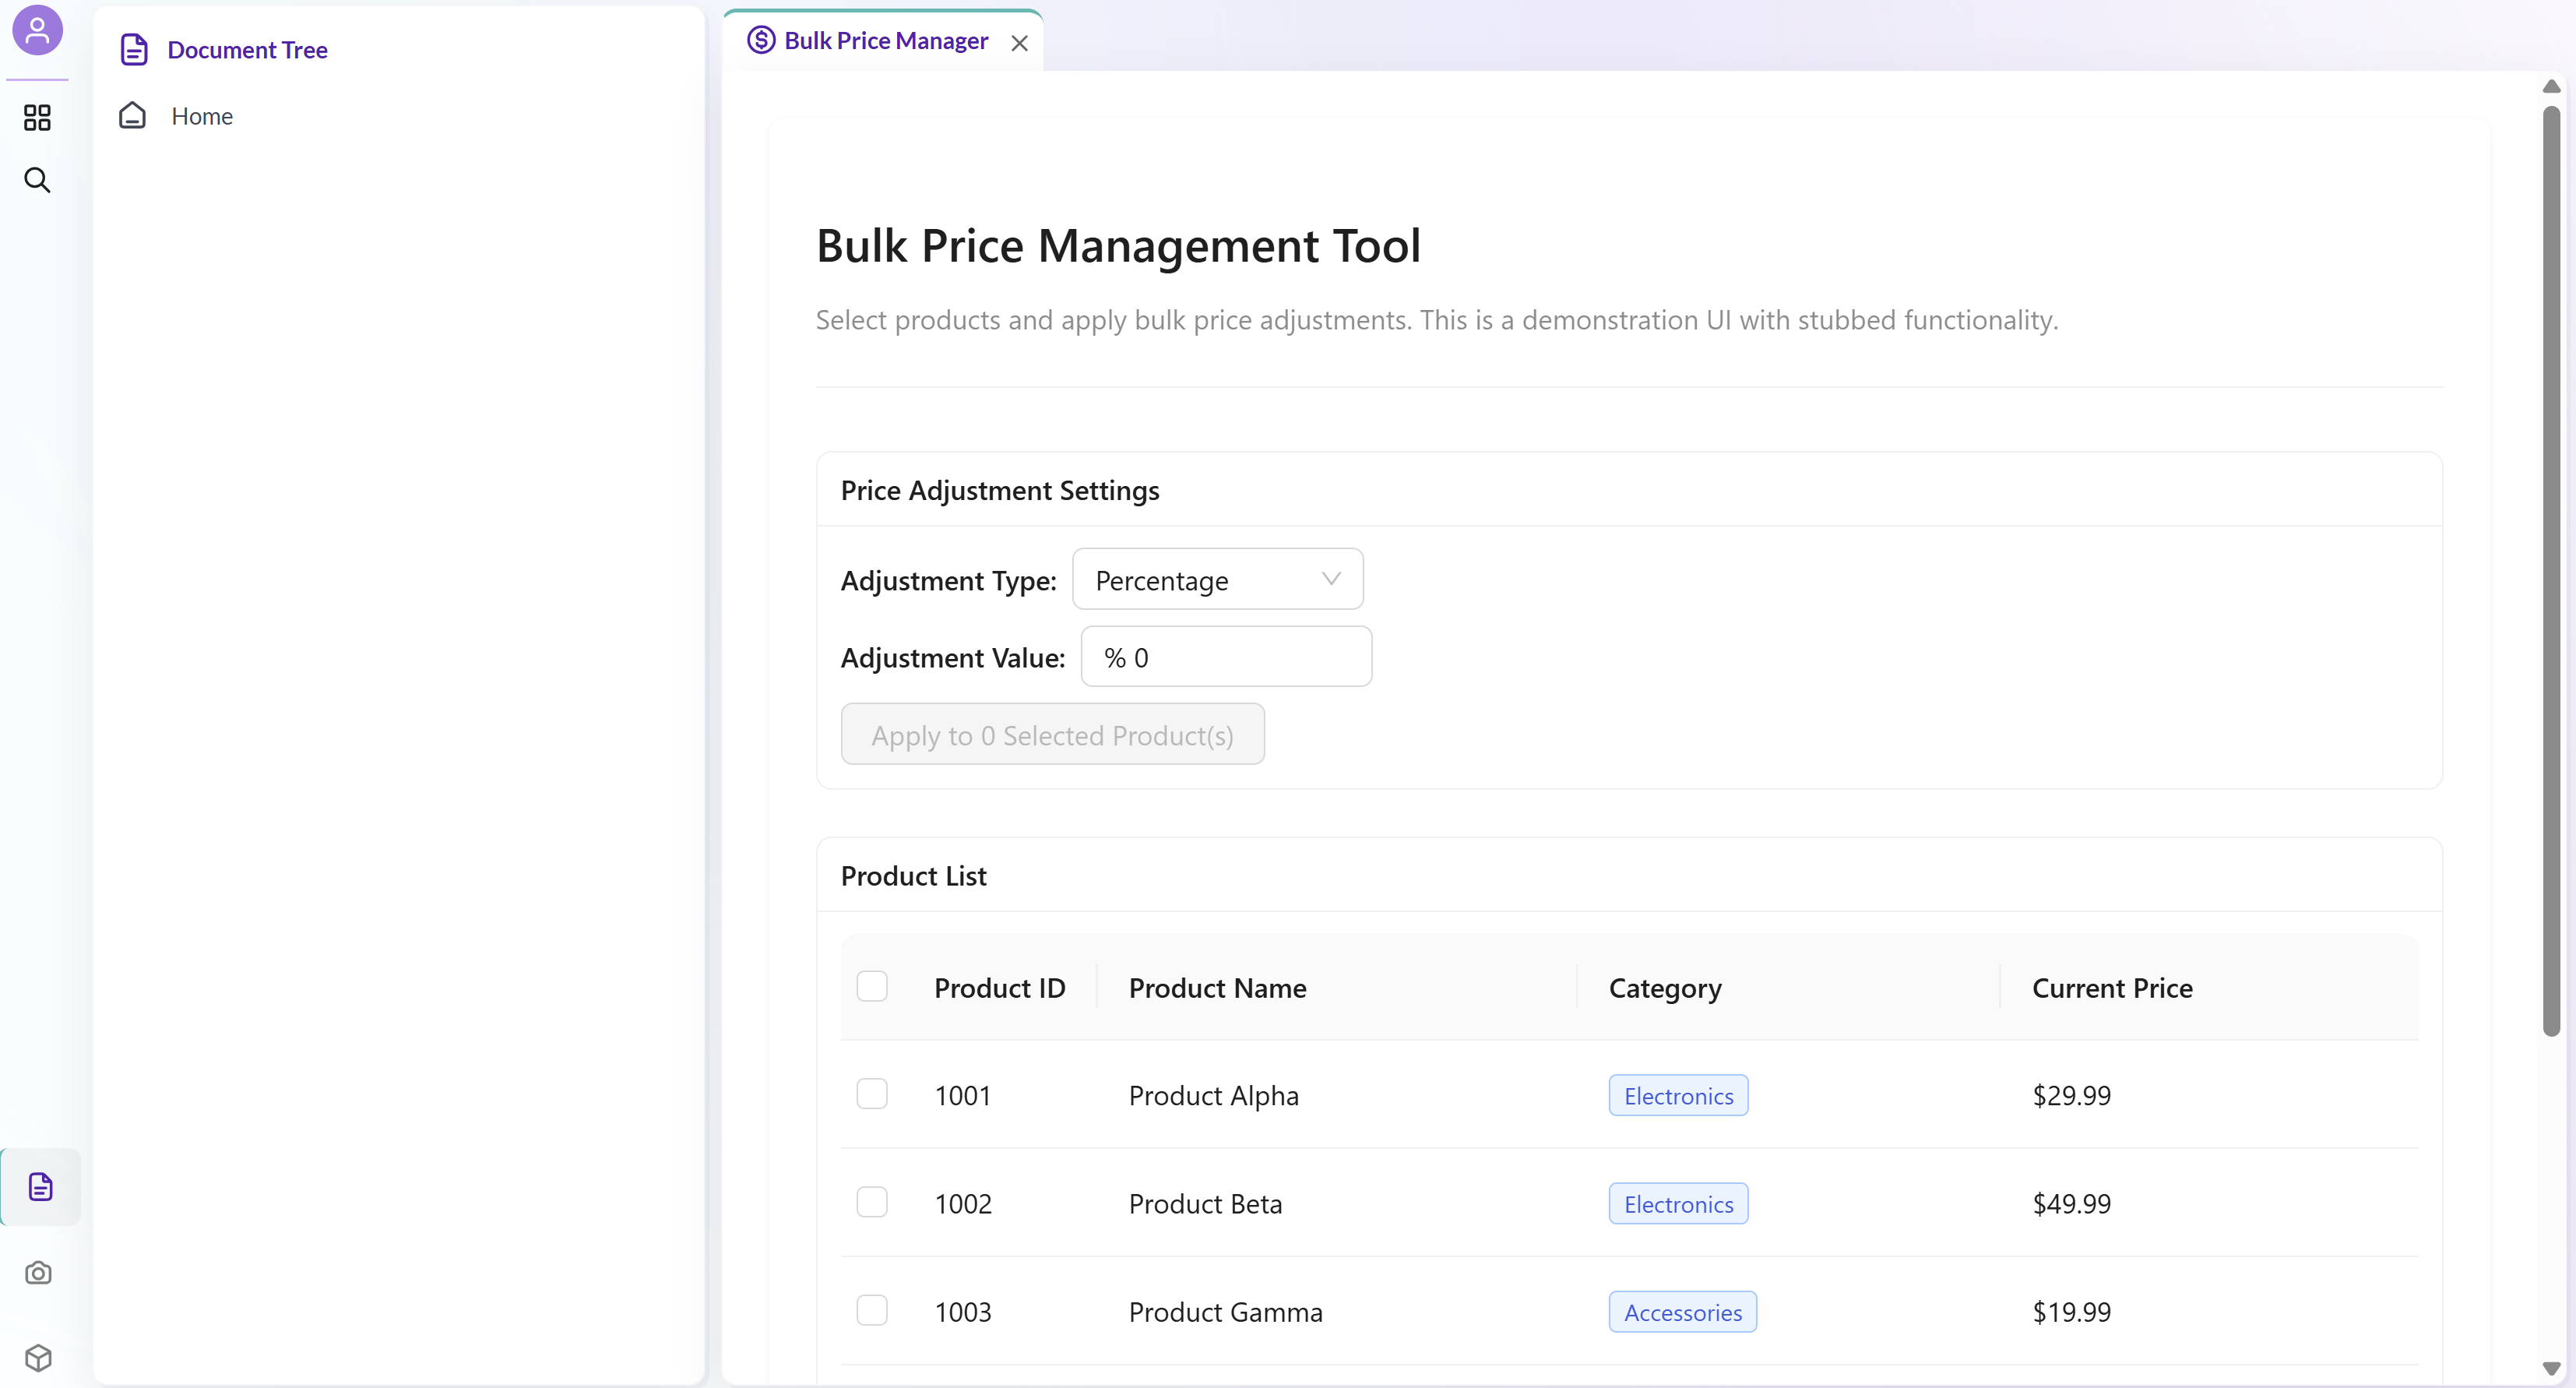
View in Studio
Check the Navigation Menu to see the new widget in action!
Conclusion
You've successfully created a custom Pimcore Studio extension with permission-based access control! This pattern can be applied to any custom tool or feature you want to add to Studio.
Stay tuned for more Studio UI content – next time we'll dig into adding custom tabs to objects with the Object Tab Manager. Happy building!